Introduction
A variety of gadgets and projects that will be generally useful at camp. Most of these can be constructed as a matter of course in any camp.
Flag Poles
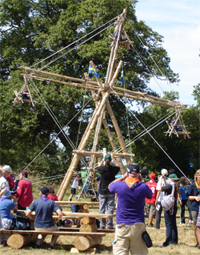
Flag Break should be a daily routine of (any?) camp and as such you may find yourself having to construct your own flag pole. There are many different types you can attempt from the simple everyday 'upright' to the more difficult but much better looking 'skylon' type.
Simple Flag Pole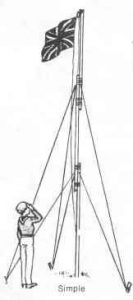
This simply consists of several long poles lashed firmly together(shear lashing) driven into the ground. You will want to attach guy lines at least to the upper part of the pole to secure it, but preferably at intervals up the height of the pole. Simply stake out with pegs as you would a main guy for a tent.
Ceremonial Flag Pole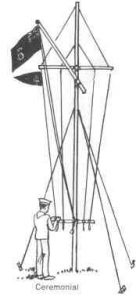
This is just a variation on the simple flag pole. On your upright you will need a cross piece (around four fifths of the way up) and a smaller pole that extends outwards at a right angle to the 'cross'. Connect rope as shown in the diagram to complete and peg down with guy lines as before.
Skylon Flag Pole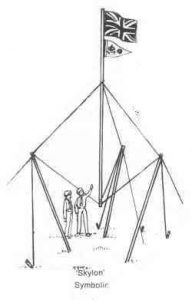
I must admit that I have not tried this type before. I'm not sure which would be the best way to construct it.
My suggestion is have a go! I certainly will the next opportunity I get.
If anybody has anything that would like to add here or some suggestions regarding this then please contact me.
Flag Pole Hoist
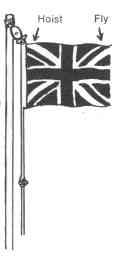 Obviously you will need to add some form of hoist mechanism if you wish to raise and lower your flag. An ideal solution would be a simple pulley system, although a rope running through a loop attached to the top of the flag pole will suffice.
Shoe Scraper
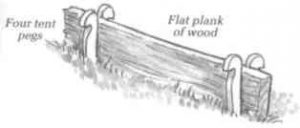 This is a candidate for 'Simplest Gadget Ever'. Simple place an upright 'board' in between four pegs driven into the ground. You can now scrap the mud off your shoes and keep the campsite tidy.
Shower
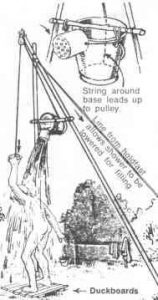 The first thing you will need to do is to construct a tall simple 'A' frame (do not bother with the normal cross members but ensure that it has a line to the top so that the frame can be lowered to refill the shower). This will let someone stand underneath the shower easily.
At the top of the frame you will need a short cross piece to which is lashed a bucket. The key point is to fix a tin (with holes pierced in the base) at right angles to the bucket so that when it is tipped over the water flows through the tin forming the shower.
To enable the bucket to tip fix a string to the base of the bucket, passing over the pulley at the top of the frame so that it hangs down. Then the person using the shower can pull the string to tip the bucket and start the shower.
As always be sensible, you will need to construct your shower out of sight, and ideally behind screens.
Washing Area
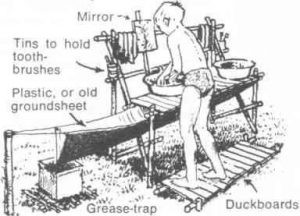 A wash area can readily be constructed if there are not any suitable facilities to hand. Construct a rectangular 'box' frame with a top board that will form the 'dresser' worktop. You will need to attach a plastic sheet under the top board shaped into a rough funnel shape that slopes down away from the wash area. At the end of this channel you place a 'grease-trap' (see the filter bins in the kitchen gadget section).
A set of duckboards may also be a sensible idea (even in hot weather the area round the washing basin may beome quite muddy, especially if it is a cub camp!). At the back of the washing area you may want to create a rectangular frame that can hold a mirror, towels, soap, and tins (to store the toothbrushes in).
