Introduction
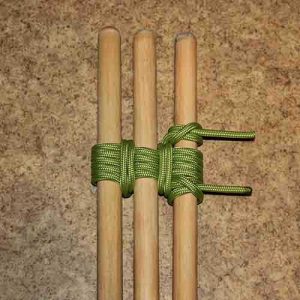
This is really just a variation on the Sheer lashing made with Racking Turns. It is often used to make a tripod or used in constructing a raft.
Step by Step Guide
- Lay out the poles. For most lashings you will want to lay the poles side by side with the butt ends aligned (thicker ends).
- Tie a clove hitch around one of the outside poles and secure the standing part by wrapping it around the running part (or trap it under the first turns).
- Start the racking turns by weaving the rope between the poles.
- Make a total of around 5 to 7 wrapping turns pulling each one tight.
- Note: The stiffness of the tripod depends on the number and tightness of the wrapping turns.
- Tighten the lashing with a frapping turn by taking the rope down between two poles at one end of the turns. This should be difficult to do if the turns have been pulled tightly (as they should be). Bring the rope back up between the poles at the other end of the lashing and pull tight. Repeat 2 or 3 times.
- Start the second set of frapping turns by taking the rope around the centre pole and frapping. Take the second set of frapping turns in the opposite direction to the first set.
- Repeat for any additional poles.
- Pass the rope once more between the poles then around one pole and tuck it under itself to form a half hitch. Pull this tight and make a second half hitch forming a clove hitch by taking the rope around the same pole and tucking it under itself.
- Notes on Tripods: Make a tripod by using a Figure-of-eight lashing on three poles. Set up the tripod by crossing the outside poles so that the cross point of the poles is under the centre pole. This makes sure that part of the load is taken by the wood in contact.
- If a symmetrical arrangement of the poles is needed within a structure the tripod can be set up by rotating the poles around the lashing. This means that the load is supported only by the ropes and the joint becomes flexible and so the tripod may become unstable.
