What is a Bearing?
A bearing is a 3 digit angle measured clockwise from north. It is a way of indicating direction without ambiguity. We usually speak of taking a bearing between 2 points, or the bearing of the pub from the church. We may need to use a bearing when the weather conditions are poor, or the surrounding landscape is unfamiliar or featureless. Then navigating by the map alone may not practical, and we may have to rely on the compass to tell us the direction in which we wish to travel. You may also need to take bearings when trying to pinpoint your position on the map by triangulation. Either way the process is quite simple once you get used to it. (Note: For accurate bearings you will need to take into account the magnetic variation, but here I will ignore this for simplicity).
Important notes on using bearings
When following a bearing (i.e. attempting to walk in the direction indicated by the compass) do not just try to look at the compass and walk in a straight line. Even when trying hard to walk in a straight line on flat ground there is usually a natural tendency to deviate slightly (normally off to the right for right handed people) and in any case, the landscape is hardly ever nice and flat. There will always be reasons to deviate off your intended path, that clump of trees, those holly bushes, that mountain spur. Even with flat ground and good 'seeing' it is very tiring to continually check your progress against the compass.
The best thing to do is to look along your bearing (taking care that the compass pointers are aligned as best you can) and notice a landscape feature that lays along that path (e.g. "that large gnarled oak tree over there"). Then you can effectively forget about the compass and just make your way to that feature along the best possible root. Take regular sightings of the feature in case you lose sight of it during your 'detours'. When you reach the feature, simply take the same bearing again, (i.e. sight along the compass again) and repeat, looking for a prominent feature. With practice this is a very quick, yet still accurate method of travel. Of course it is not very effective in very poor weather conditions, at night, or in featureless landscapes, and there you will have to rely on regular (frequent!) checks on your compass. But for most situations it is effective.
Taking a bearing
To take a bearing between two points follow these steps (again I will assume we are using a common 'Silva' type compass). Note the two alternative methods at steps 1 and 4:
- Leave the map as it is (in any old direction) OR [Set up the map so that it is facing north.]
- Locate the point at which you wish to walk from, point A, (i.e. usually your current location) and the point you wish to walk to, point B.
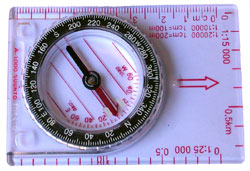
- Align the compass edge (assuming it is rectangular) so that it forms a line between these two points. Note that the compass should be facing in the correct direction (the direction of travel arrow should be pointing towards the place you want to go, the bottom of the compass is placed at your current location). If the compass is not long enough to do this, use a ruler or similar to join the two points and place the compass alongside this. The compass does not have to have the direction of travel arrow touching the two points (i.e. parallel lines will have the same bearing).
- Rotate the dial so that the faint vertical lines on the dial itself align themselves with the vertical (blue) grid lines on the map OR [Rotate the dial so that the red marker on the bottom of the dial matches up with the red end of the north-south pointer]
- You can now pick up the compass if you wish. Read off the number on the dial against the direction of travel arrow (there will usually be a small black marker to help you in this). This 3 digit number is the bearing of B from A. (Do not worry too much about the 3 digit business. If the angle marked is 30° it should be called 030° but this does not really matter too much). As always be careful about how many degrees each line on your compass represents. There are many different types with different markings, but usually each small line is worth 2° with intervals of 20° marked on the dial in writing.
- If you wish to walk in a straight line from A to B, simply keep an eye on the compass and follow the direction of travel arrow. You must take care to ensure that the two red pointers (north-south and red marker on the bottom of the dial) remain aligned at all times.
Featured Resources
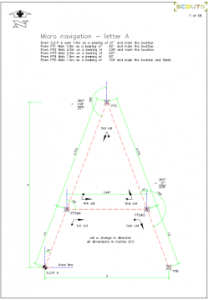
Be sure to check out the excellent resources provided by Graham from the 12th Andover West. The micro navigation resources are work of the highest quality and an incredibly useful tool to help those who are teaching bearings
Featured Resources
Micro Navigation: Bearing resource by Graham Williams, 12th Andover West
